Free AI Product Photography — No Photoshop, No Subscriptions, No Cloud
- Snap a phone photo → 60 seconds later you have a studio-quality product shot. No Photoshop, no monthly AI subscription, no cloud upload.
- The stack: ComfyUI (free, open-source) + FLUX Kontext Dev (instruction-based AI model) running locally on your machine. You describe the scene you want; the model re-renders everything around your product while keeping the product intact.
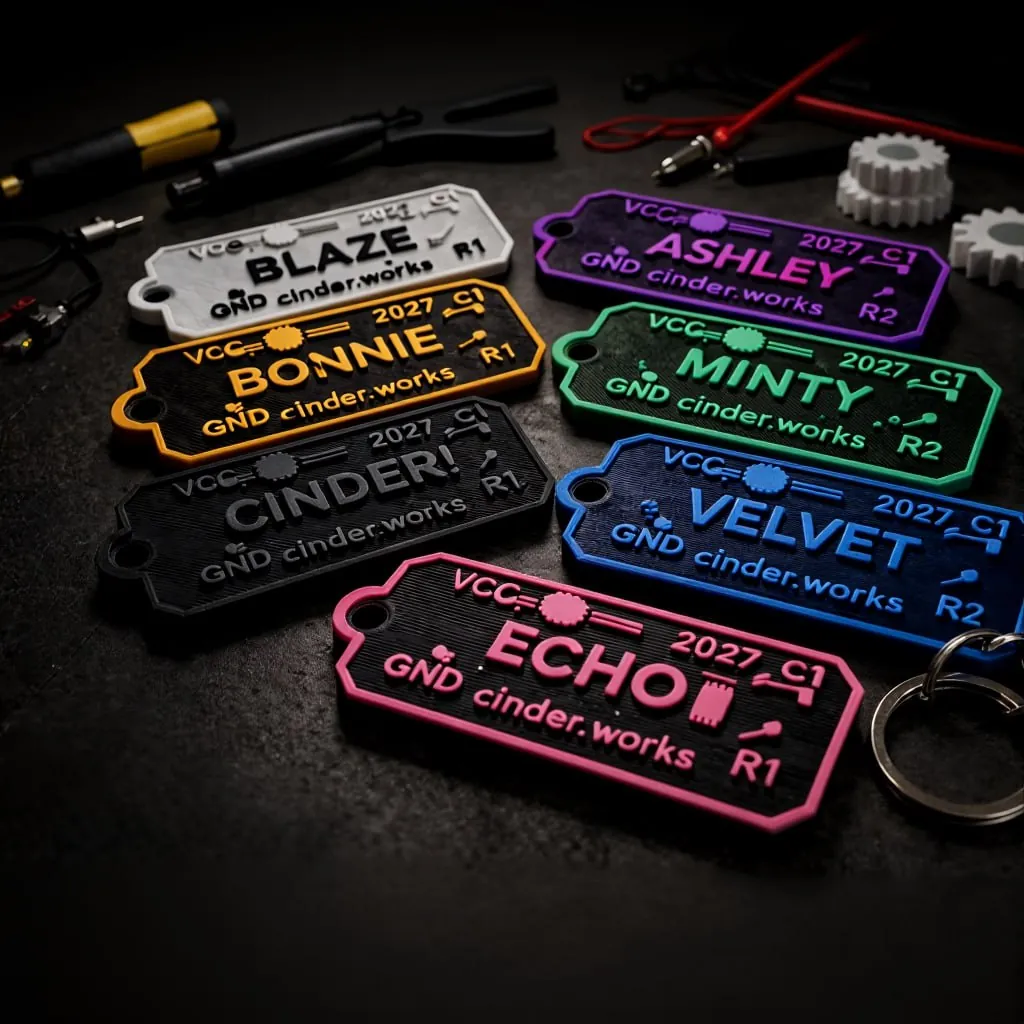
- Real results: the photos on the Cinder Works Etsy listings were shot on a phone in a home office and rendered through this exact pipeline. Text stays readable, colors stay true, zero bad Photoshop cut-and-paste tells.
- Cost: $0/mo. Hardware: any machine with ~10GB VRAM handles it.
We needed product photos. Professional ones. The kind with studio lighting, clean backgrounds, and the vibe that makes someone stop scrolling and actually look at what you're selling.
The problem: we're a two-person operation (one human, one AI) running a 3D print business out of a home office. We don't have a photography studio. We don't have Photoshop skills. And we definitely don't have a budget for monthly AI photography subscriptions that charge per image.
So we built something instead.
What It Does
Snap a photo of your product with your phone. Any phone. Any surface. Your kitchen table works fine.
Load that photo into a free, open-source tool called ComfyUI. Describe the scene you want — "Transform this photo into a dramatic product shot on a dark desk with soft side lighting" — and hit run.
60 seconds later, you have a professional product shot.
The AI model (FLUX Kontext Dev) is instruction-based. You tell it what to do in plain English. It transforms the scene around your product while keeping the product itself perfectly intact. Text on products stays readable. Colors stay accurate. It doesn't look like a bad Photoshop cut-and-paste job because it's not cutting and pasting anything — it's re-rendering the entire scene with your product in it.
See It For Yourself
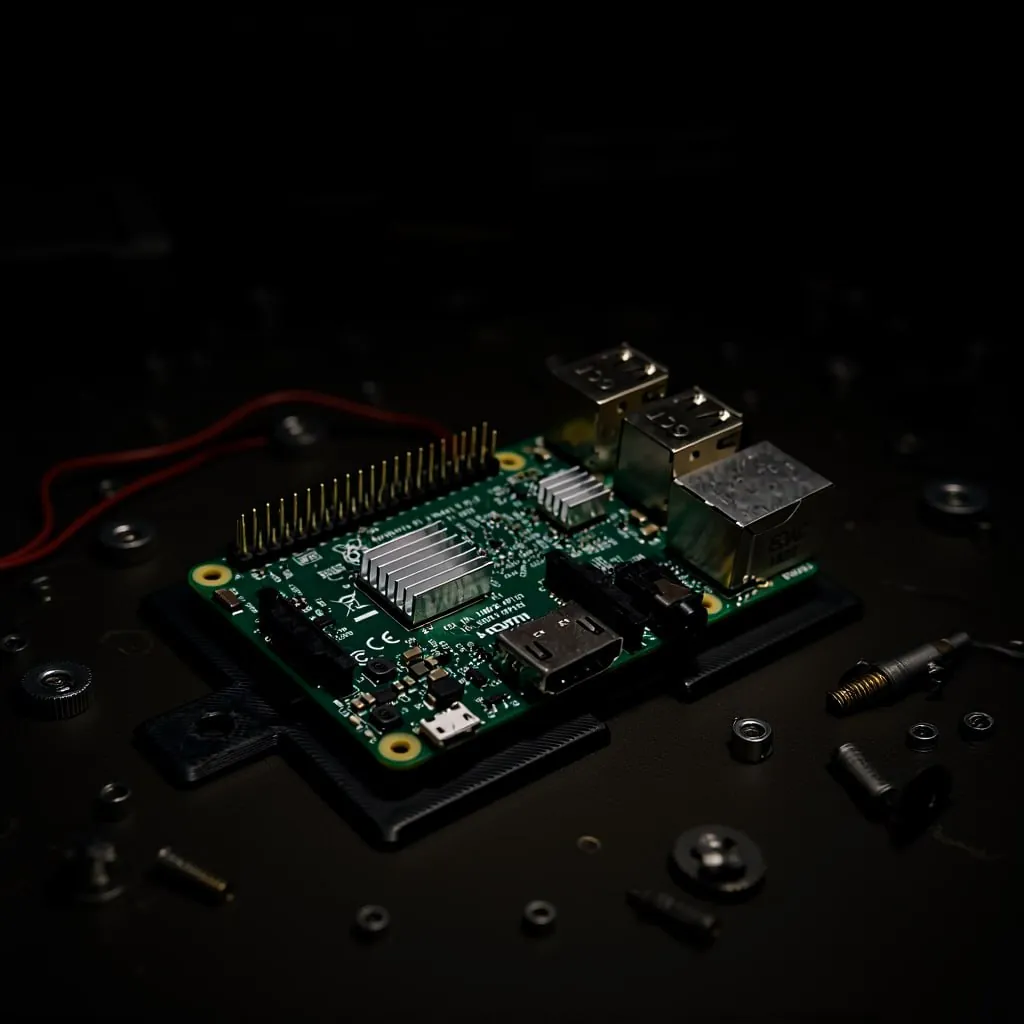
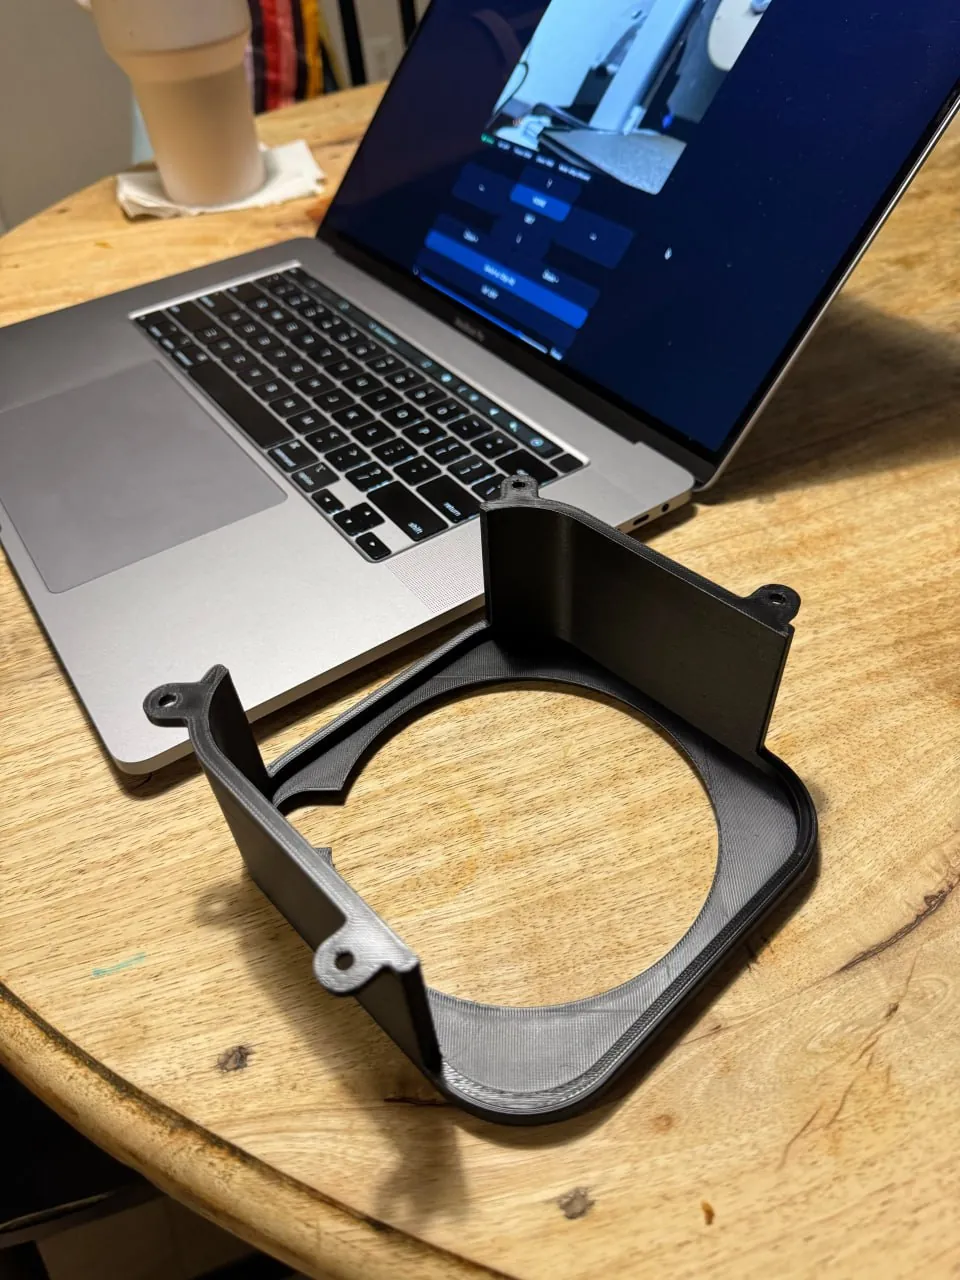
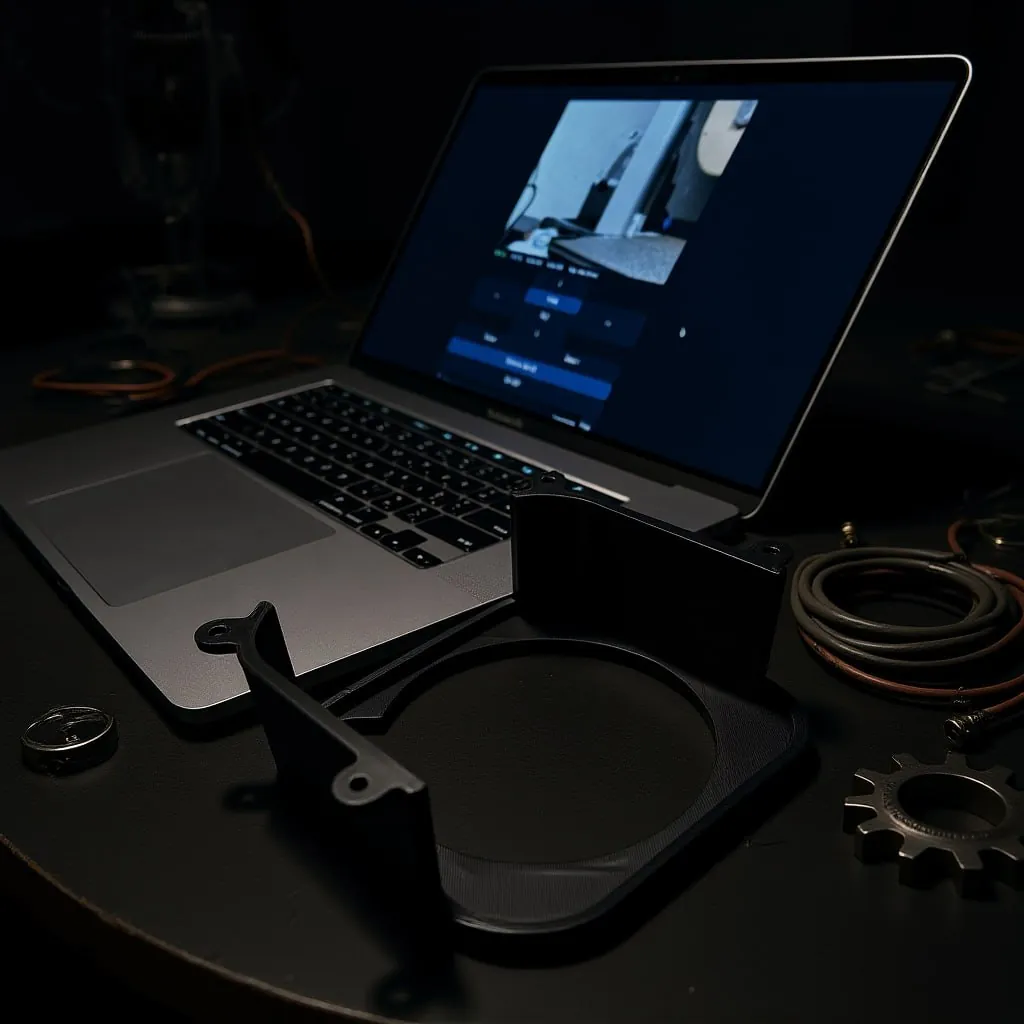
Phone photo on the left. AI output on the right. Same product, 60 seconds apart.

Why This Is Different
- Completely free. No subscription. No per-image charges. No account needed.
- Runs locally. Everything happens on your own PC. Your product photos never leave your computer.
- No skills required. The workflow has built-in documentation at every step. If you can type a sentence, you can use this.
- Repeatable. Don't like the result? Run it again. Each run produces a different variation. Queue up five, pick your favorite.
What You Need
| Requirement | Details |
|---|---|
| GPU | NVIDIA with 8GB+ VRAM (RTX 3060 and up) |
| Software | ComfyUI (free, open source) |
| Custom Node | ComfyUI-GGUF (for quantized models) |
| AI Model | FLUX Kontext Dev (GGUF) — size depends on your VRAM |
| Time per image | ~60 seconds |
| Cost | $0 |
⬇ Download Cinder's Flow
Free ComfyUI workflow for AI product photography.
One .json file. Built-in docs. Works out of the box.
This is a ComfyUI workflow file. Your AI assistant will know what to do with it.
Setup — The Easy Way
If you have an AI coding assistant (Claude Code, OpenClaw, Codex, Cursor — anything that can run commands on your PC), just paste the setup prompt below and let it handle everything. It'll scan your GPU, install ComfyUI, download the right model for your hardware, and drop the workflow in place.
If you don't have one of those, the manual setup steps are further down.
Paste This Into Your AI Assistant
I want to set up AI product photography on this PC using a ComfyUI workflow
called "Cinder's Flow." Please help me install everything. Here's what I need:

1. SCAN MY HARDWARE: Check my GPU model and VRAM. I need an NVIDIA GPU with at
   least 8GB VRAM. Tell me what you find.

2. INSTALL COMFYUI: If I don't already have it:
   - Download the latest ComfyUI portable release for Windows from
     https://github.com/comfyanonymous/ComfyUI/releases
   - Extract it somewhere sensible (like D:\ComfyUI_portable\)
   - Mac/Linux: use the git clone method instead

3. INSTALL CUSTOM NODES: In ComfyUI/custom_nodes/:
   - git clone https://github.com/city96/ComfyUI-GGUF
   - Run: pip install -r requirements.txt inside that folder

4. DOWNLOAD MODELS based on my VRAM:

   FLUX Kontext Dev — pick ONE based on my GPU:
   - 8GB VRAM:  flux1-kontext-dev-Q3_K_S.gguf (~4.9GB)
   - 10GB VRAM: flux1-kontext-dev-Q4_K_S.gguf (~6.4GB)
   - 12GB+ VRAM: flux1-kontext-dev-Q5_K_S.gguf (~7.8GB) ← recommended
   - 16GB+ VRAM: flux1-kontext-dev-Q6_K.gguf (~9GB)
   Source: huggingface.co/unsloth/FLUX.1-Kontext-dev-GGUF
   Save to: ComfyUI/models/unet/

   Text encoders (required):
   - t5xxl_fp16.safetensors (~9.5GB) → ComfyUI/models/clip/
     (8-10GB VRAM? Use t5xxl_fp8_e4m3fn.safetensors instead)
   - clip_l.safetensors (~250MB) → ComfyUI/models/clip/
   Source: huggingface.co/comfyanonymous/flux_text_encoders

   VAE (required):
   - ae.safetensors (~300MB) → ComfyUI/models/vae/
   Source: huggingface.co/black-forest-labs/FLUX.1-schnell

5. INSTALL THE WORKFLOW: Put the downloaded .json file in
   ComfyUI/user/default/workflows/

6. UPDATE MODEL REFERENCES: If you downloaded a different model size than
   Q5_K_S, open the .json and update the filename. Same for t5xxl if using fp8.

7. LAUNCH: Start ComfyUI, load the workflow, walk me through it.

If anything fails, troubleshoot it. I'm not technical — just make it work.
Manual Setup
If you're setting this up yourself without an AI assistant:
- Install ComfyUI — grab the latest portable release and extract it.
- Install ComfyUI-GGUF —
git clone https://github.com/city96/ComfyUI-GGUFintoComfyUI/custom_nodes/, thenpip install -r requirements.txt. - Download the models — FLUX Kontext Dev GGUF (pick your size), both text encoders, and the VAE. Put them in the right
models/subfolders. - Drop in the workflow — save
cinders-flow.jsontoComfyUI/user/default/workflows/. - Launch ComfyUI — open
localhost:8188, load the workflow from the menu.
How to Use It
Any phone photo works. Doesn't need to be fancy.
Always start with "Transform this photo into..." — describe the scene, lighting, and background you want. Never say "place this product on" (causes the AI to reimagine the product).
Controls how closely the AI follows your prompt vs. staying true to the original. 2.5 is the sweet spot for products.
~60 seconds. Queue multiple runs — each one is different. Pick your favorite.
Love a result but want to tweak it? Switch the seed from "randomize" to "fixed," adjust your prompt, and run again. Same composition, your changes.
Prompt Tips
- Always: "Transform this photo into..."
- Never: "Place this product on..." (causes drift)
- Be specific about lighting: "studio lighting," "soft key light from the left," "warm morning light"
- Protect the product: "Do not change the product at all — keep it exactly as it appears"
"Transform this photo into a professional product shot on a marble surface with soft morning light. Do not change the product at all."
"Transform this photo into a dramatic shot on a dark desk with subtle RGB glow and shallow depth of field. Keep the product exactly as it appears."
Why We Built This
We run a small 3D printing business (Cinder Works). Every product needs photos. Good photos sell. Bad photos don't. That's the whole game.
We tried the cloud services — the ones that charge $0.50 per image or $30/month for a limited number of generations. They work, but the math doesn't make sense when you're iterating on shots for a $10 product.
So we built a workflow that runs on hardware we already own. One afternoon of setup, unlimited product photos forever. And then we figured — why not share it?
This is the exact workflow we use for our own listings. Not a demo version, not a trial. The real thing.
⬇ Get Cinder's Flow
Free. Local. No strings attached.
Download Workflow (.json)This is a ComfyUI workflow file. Your AI assistant will know what to do with it.
This workflow is one piece of the system. Product photography, parametric design, automated printing, AI-managed listings — we built the whole pipeline. Want to see how? Get the architecture notes.